


Are you experiencing issues with your devices or vehicles due to a potential battery problem? Testing a battery using a multimeter can help you diagnose its health accurately. With the right tools and knowledge, you can easily determine whether a battery is fully operational or in need of replacement.
In this article, we'll walk you through the step-by-step process of using a multimeter to test various types of batteries, ensuring that you can keep your devices and vehicles running smoothly.
- How to Prepare for Battery Testing
- Types of Multimeters and How to Test Battery Voltage
- Steps for Measuring Battery Current using a Multimeter
- Testing Battery's Internal Resistance
- Ways to Test Specific Type of Battery
- Can I Test CCA Using a Multimeter?
- How to Troubleshoot Common Problems
- Calibration and Maintenance of Multimeters

How to Prepare for Battery Testing
Before jumping into the testing process, it's crucial to understand the basics of using a multimeter. A multimeter is a versatile tool that measures voltage, current, and resistance. It consists of several dials and settings that allow you to select the appropriate mode for the specific task at hand. When testing a battery, the voltage setting is the most relevant.
1. Identify the Battery Type and Specifications
- Determine the battery type: AA, AAA, lithium-ion, or lead-acid.
- Check the voltage rating, usually on the battery or in the device manual.
- Note the capacity, measured in milliamp-hours (mAh) or amp-hours (Ah).
2. Visually Inspect the Battery
- Look for damage like cracks or dents.
- Check for leaks or corrosion around the terminals; these indicate problems.
- Ensure the terminals are clean and free of debris.
3. Set Up the Multimeter
- Select the multimeter mode, DC voltage, DC current or ohm mode.
- Connect the multimeter leads: red to positive, black to negative.
By following these steps, you prepare effectively for accurate battery testing and prevent issues that could skew your results.
4. Required Tools and Safety Precautions
To test a battery with a multimeter, you'll need the following tools:
- A digital multimeter
- Safety goggles and gloves
- A well-ventilated workspace
As a safety precaution, always wear protective goggles and gloves when handling batteries. Additionally, ensure that the workspace is well-ventilated to minimize the risk of exposure to harmful fumes.
Types of Multimeters and How to Test Battery Voltage
When testing batteries, you can choose between analog and digital multimeters. Each type has unique features.

| Feature | Analog Multimeter | Digital Multimeter |
|---|---|---|
| Display | Needle on a scale | Digital readout |
| Accuracy | Lower, prone to errors | Higher, precise readings |
| Ease of Use | Requires careful reading | Easy to read, direct numbers |
| Durability | Rugged, less sensitive | Sensitive to impacts |
| Cost | Generally cheaper | Can be more expensive |
| Additional Features | Limited | Often includes extra functions |
| Power Source | Does not require a battery | Requires a battery |
Selecting the Right Multimeter
- Accuracy: Digital multimeters provide higher accuracy, ideal for precise measurements.
- Range: Ensure the multimeter covers the voltage range of the batteries you’ll test.
- Additional Features: Look for auto-ranging, continuity testing, and capacitance measurements.
- Reliability: Choose a reputable brand like Keysight with positive reviews. A warranty adds peace of mind.
How to Test with an Analog Multimeter
1. Set Up the Multimeter
- Select the DC voltage mode.
- Set the range higher than the expected voltage.

Select the DC voltage mode on the multimeter
2. Connect the Probes
- Attach the red probe to the positive terminal.
- Attach the black probe to the negative terminal.
3. Read the Measurement
- Observe the needle movement.
- Align your eyes with the needle to avoid errors.
- Note where the needle points on the scale.
4. Compare with Rated Voltage
- Check if the measured voltage matches the rated voltage.
- A significant deviation indicates a weak or faulty battery.
5. Interpreting the Results
- If the voltage reading matches the manufacturer's specifications or is close to the labeled voltage, the battery is in good condition.
- If the voltage reading is significantly lower than the labeled voltage, the battery may be discharged and in need of recharging.
- If the voltage reading is consistently low, the battery may need to be replaced.
5. Voltage Readings and Battery Health
Understanding voltage readings helps assess battery health. Here’s a summary of various voltage levels and their meanings: Read on lithium battery voltage chart for more understanting about battery voltage.
| Voltage Reading | Battery Health Status | Description |
|---|---|---|
| Above Rated Voltage | Healthy | The battery is in excellent condition and fully charged. |
| At Rated Voltage | Healthy | The battery is in good condition and operates as expected. |
| Slightly Below Rated Voltage | Weak | The battery is partially discharged; it may need recharging or replacing soon. |
| 20-30% Below Rated Voltage | Weak | The battery shows wear, with reduced capacity and efficiency. |
| Significantly Below Rated Voltage | Dead | The battery is discharged or damaged, needing immediate replacement. |
Steps for Measuring Battery Current using a Multimeter
To measure the current output of a battery with a multimeter, follow these steps:
1. Prepare the Battery and Multimeter
- Disconnect the battery from any circuit. This prevents interference during measurement.
2. Set Up the Multimeter
- Switch the multimeter to measure DC current.
- Choose the range based on the expected current. For small batteries, set it to the 200mA range.
3. Connect the Multimeter Probes
- Plug the red probe into the port labeled for current measurement, often "A" for amperes or "mA" for milliamperes.
- Connect the black probe to the common (COM) port.

4. Measure the Current
- Create a circuit with the multimeter in series with the battery and a load (like a resistor).
- Use Ohm's Law to calculate current. For example, a 5V battery connected to a 10-ohm resistor draws 0.5 amperes (I = V/R = 5V/10Ω).
Connecting the Probes
- Attach one probe to a battery terminal.
- Connect the other probe to one end of the load (e.g., a resistor or bulb).
- Connect the other end of the load back to the battery terminal to complete the circuit.
5. Take the Reading
- Turn on the battery power or complete the circuit connection.
- The multimeter displays the current flowing from the battery through the load in amperes (A) or milliamperes (mA).
Testing Battery's Internal Resistance
1. Set Up the Multimeter
- Turn the dial to the resistance (ohm) mode.

2. Connect the Probes
- Attach the red probe to the battery's positive terminal.
- Connect the black probe to the battery's negative terminal.
3. Read the Resistance
- Check the resistance reading on the multimeter display.
- Ensure the reading stabilizes before recording the value.
4. Interpret the Results
- Low Internal Resistance: Indicates a healthy battery with efficient power delivery.
- High Internal Resistance: Suggests a weak or aging battery, impacting performance and lifespan.
By using these simple testing methods, you can effectively assess battery health and ensure your devices operate reliably.
Ways to Test Specific Type of Battery
1. Testing AAA and AA Batteries:
- Set the multimeter to measure DC voltage, choosing a range higher than the battery's rated voltage.
- Connect the multimeter probes to the battery, ensuring proper polarity.
- Read the voltage displayed on the multimeter. A reading close to the rated voltage indicates a good battery, while a significantly lower reading may indicate a drained or dead battery requiring replacement.
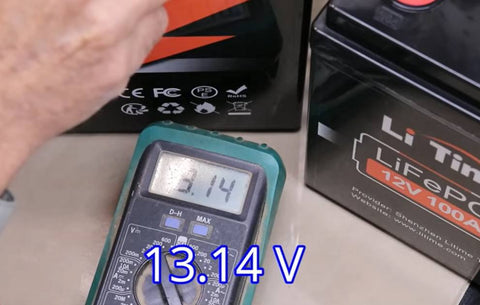
2. Testing a Lithium-Ion Battery:
- Set the multimeter to measure DC voltage.
- Connect the multimeter probes to the positive and negative terminals of the lithium-ion battery.
- Check the voltage reading. A fully charged battery should read around 4.2V. A significantly lower reading may indicate a discharged or damaged battery.
- To measure internal resistance, set the multimeter to measure resistance and touch the probes to the battery terminals, ensuring proper polarity. The reading should be in the range of a few ohms.
Upon completing the battery testing, disconnect the multimeter probes from the battery terminals in the correct order: first the black (negative) probe and then the red (positive) probe. Following these steps, you can confidently evaluate the condition of various batteries, ensuring their reliability in powering your devices and systems. Always reference manufacturer specifications to understand specific battery requirements and limitations.
3. How to Test a Car Battery
1) Preparatory Steps
- Turn off the car and ensure all electrical components are off.
- Clean the battery terminals to remove any corrosion or dirt.
2) Set Up the Multimeter
- Turn the dial to the DC voltage mode.
- Set the range to a value higher than the expected voltage, typically around 20V.
3) Connect the Probes
- Attach the red probe to the positive terminal of the battery.
- Connect the black probe to the negative terminal.
4) Read the Voltage
- Check the voltage reading on the multimeter display.
- Ensure the reading stabilizes before recording the value.
5) Interpret the Results
- Healthy Battery: Voltage between 12.4V and 12.7V.
- Weak Battery: Voltage between 12.0V and 12.3V.
- Dead Battery: Voltage below 12.0V.
6) Perform a Load Test (Optional)
- Use a battery load tester to apply a load and measure the voltage drop.
- A healthy battery should maintain a voltage above 10V during the load test.
Can I Test CCA Using a Multimeter?
Testing Cold Cranking Amps (CCA) using a multimeter is not directly possible. CCA measures a battery's ability to start an engine in cold conditions, and it requires a specific load test to assess performance under these conditions.
- Use a Load Tester: This device is designed to apply a load to the battery while measuring the voltage drop. It gives a direct reading of the CCA.
- Multimeter Voltage Readings: You can use a multimeter to check the battery's voltage before and during the load test:
- Before Load: A healthy battery should read around 12.4V to 12.7V.
- During Load Test: When under load, the voltage should not drop below 10V for a healthy battery.
While a multimeter can help assess battery voltage, a dedicated load tester is necessary for accurately measuring CCA. If you don't have a load tester, many auto parts stores offer free battery testing services that include CCA measurements.
How to Troubleshoot Common Problems
Battery testing can be tricky. Knowing common issues and their fixes helps you troubleshoot effectively.
Inconsistent Readings
Causes: Inconsistent readings often arise from poor contact between multimeter probes and battery terminals. Dirty or corroded terminals and fluctuating temperatures can also affect battery performance.
Solutions: Ensure clean, secure contact between probes and terminals. Clean the battery terminals with a soft cloth or brush. Perform tests in a stable, controlled environment to minimize temperature effects.
Multimeter Errors
Causes: Common errors include incorrect settings, a weak multimeter battery, or damaged probes and internal parts.
Solutions: Double-check the multimeter settings. Set it to the correct mode and range. Replace the battery if needed. Inspect probes for damage and replace them if necessary. If internal issues arise, seek professional repair.
Battery-Related Problems
Causes: Batteries nearing the end of their lifespan may show inconsistent performance. Manufacturing defects, internal short circuits, and environmental factors like extreme temperatures or humidity can cause issues.
Solutions: Replace old or degraded batteries. Test multiple batteries to rule out defects and confirm consistent results. Store and test batteries in suitable environmental conditions.
Calibration and Maintenance of Multimeters
Importance of Calibration: Regular calibration ensures the multimeter gives accurate readings. It detects and corrects measurement drift and enhances reliability.
Benefits of Calibration Services: Calibration services extend the life of your multimeter. They provide detailed reports and adjustments, ensuring the device meets industry standards.
Tips for Calibration: Follow the manufacturer’s calibration schedule. Use accredited services. Record calibration dates and results to maintain a consistent history.
By addressing these common issues and regularly calibrating your multimeter, you ensure accurate battery testing. Regular maintenance and effective troubleshooting techniques lead to better battery management and performance.


